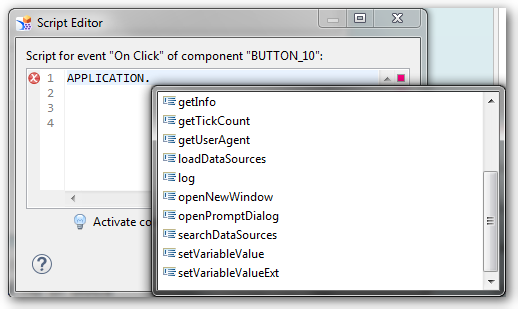
I just want to implement a button which should print my application. I found a tutorial, which says the code is APPLICATION.PRINT. But when I write the coding in Design Studio, .Print isn’t available.
Design Studio Script Editor
Now I am confused. After a little research, I found following Post. So you can write
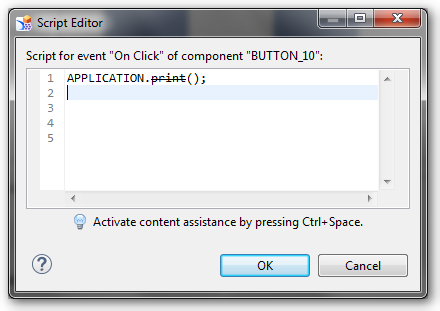
APPLICATION.PRINT and the script editor strikes out print.
Design Studio Script Editor Application.Print
But this coding works. Maybe in further releases the print function will be deleted.
I am Tobias, I write this blog since 2014, you can find me on twitter and youtube. If you want you can leave me a paypal coffee donation. You can also contact me directly if you want.
I just started working intensive with SAP Design Studio and developing own components. When you install Design Studio 1.6, it starts in
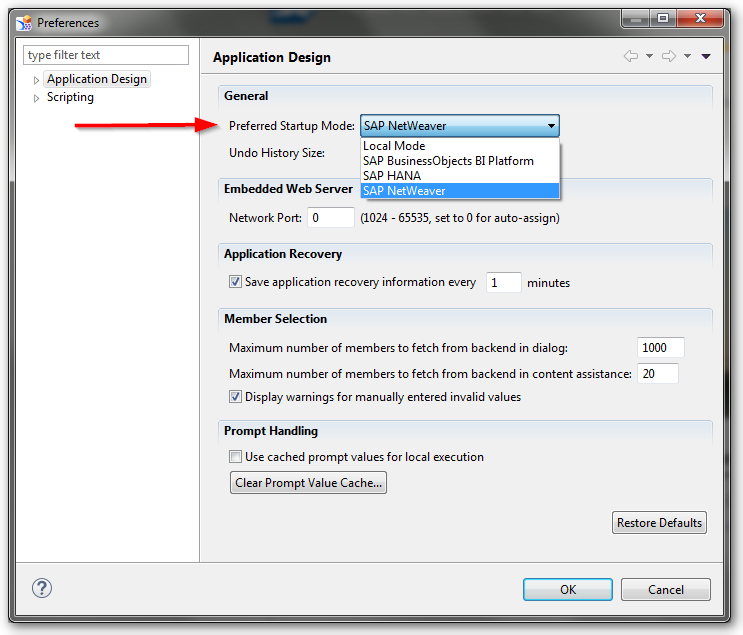
local mode. In this mode you can save your design studio application only on your local maschine. If you want to use other supported platforms, you have to select the required platform in the
settings.
Design Studio Preferences
You can always work in the local mode, if you click Skip in the Logon to dialog box. More information can be find in the Administrator Guide.
I am Tobias, I write this blog since 2014, you can find me on twitter and youtube. If you want you can leave me a paypal coffee donation. You can also contact me directly if you want.
I am Tobias, I write this blog since 2014, you can find me on twitter and youtube. If you want you can leave me a paypal coffee donation. You can also contact me directly if you want.
In some cases you want to trigger an external program from a SAP system. In this part 1 I explain how to build a RFC Server with NCo 3.0. I had several problems when I started with this topic so
I decided to write a short example. If someone want the Visual Studio project files, please contact me.
So let’s go.
This Post describes how to build a simple RFC Server using SAP NCo 3.0 and the app.config. Part 2 will be describe how to build a RFC Server with RFC Parameter. As example program I use
STFC_CONNECTION. It is a good example, because it contains importing and exporting parameters.
First you have to download and install NCo 3.0 (OSS login required). Afterwards you have
to start a new project in Visual Studio.
Setting up the Visual Studio Project:
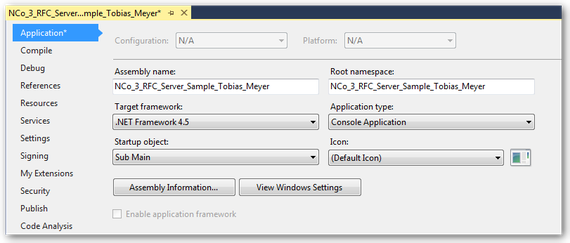
In the properties of the project you have to use a new console application. As target framework I use .Net Framework 4.5.
Visual Studio Project Properties
Next you have to add references to the SAP .Net Connector. There are two DLLs (sapnco.dll and sapnco_utils.dll). Since NCo 3.0 SAP offers a help manual which describes all commands.
Visual Studio Project References
Define the SAP Connections
There are many methods you can use to define a SAP host. For a quick and simple solution you can use the app.config to define your SAP connection.
For basic RFC server configuration, there are two sections that are used. One section are the ClientSettings, the other the ServerSettings. A RFC server configuration is linked to a RFC
repository by using the REPOSITORY_DESTINATION attribute. To be able to access function metadata, this attribute must match the name of a destination in the
client settings.
All RFC servers communicate with a SAP system through a service called the SAP gateway service. The server settings
defines how the application connects to the gateway. In the server section the NAME field identifies this entry to your RFC Connection in a SAP system. The SAP .Net Connector uses the values in
the GWHOST, GWSERV and PROGRAM_ID fields to register your program on the SAP Gateway. The PROGRAM_ID must match the Registered Server Program of your RFC
Destination.
<? xml version="1.0" encoding="utf-8" ?><configuration><configSections><sectionGroupname="SAP.Middleware.Connector"><sectionGroupname="ServerSettings"><sectionname="ServerConfiguration"type="SAP.Middleware.Connector.RfcServerConfiguration, sapnco"/></sectionGroup><sectionGroupname="ClientSettings"><sectionname="DestinationConfiguration"type="SAP.Middleware.Connector.RfcDestinationConfiguration, sapnco"/></sectionGroup></sectionGroup></configSections><SAP.Middleware.Connector><ServerSettings><ServerConfiguration><servers><addNAME="DINOZZO"GWHOST="xxx.xxx.xxx.xxx"GWSERV="SAPGW00"PROGRAM_ID="STFC_CONNECTION"REPOSITORY_DESTINATION="ABC"REG_COUNT="1"/></servers></ServerConfiguration></ServerSettings><ClientSettings><DestinationConfiguration><destinations><addNAME="ABC"USER="user"PASSWD="password"CLIENT="client"LANG="EN"ASHOST="xxx.xxx.xxx.xxx"SYSNR="00"/></destinations></DestinationConfiguration></ClientSettings></SAP.Middleware.Connector><startup><supportedRuntimeversion="v4.0"sku=".NETFramework,Version=v4.5"/></startup></configuration>
SAP Function module:
SAP transaction se37 can be used to find out the parameters for the STFC_CONNECTION. In this example, you receive a parameter REQUTEXT, which will be returned to the caller in ECHOTEXT.
It also return a text string to the caller in field RESPTEXT.
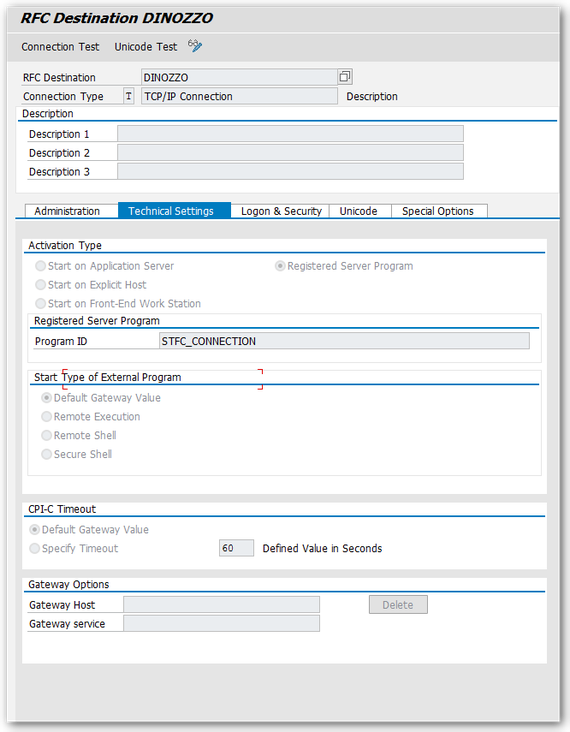
Transaction sm59 is used to configure the RFC Destination. The name of the RFC Destination.
SAP RFC Destination
Coding:
First you have to create a class that exposes a method that can be called via a SAP RFC Call. In the example that class is named ServerFunction and it
contains one method which will supply the STFC_CONNECTION functionality.
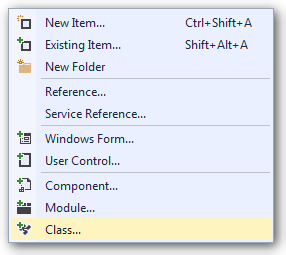
Add a new class in the Visual Studio
Visual Studio Add new class
Import the NCo functions
Create a method, similar to this one
Visual Studio Method
Now you have to implement the coding for Main()
First Import the NCo functions
Afterwards you have to create a similar coding
Visual Studio Sub
RfcServerManager.GetServer(„DINOZZO„, New Type(0) {GetType(ServerFunction)})
DINOZZO references to the RFC Destination name in transaction sm59 and in the app.config.
ServerFunction references to the class above.
The RFC Server will be started by following code: RemoteServer.Start
In SAP transaction SMGW >> Goto >> Logged on Clients you can now see your program running on the application gateway.
SAP Connection (transaction SMGW)
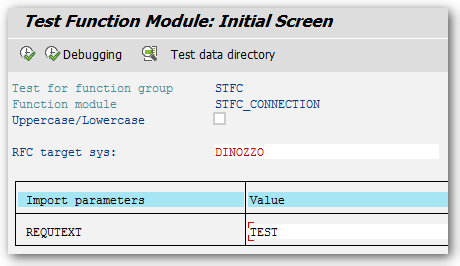
Now you can use the test function screen in transaction se37 to test STFC_CONNECTION. The RFC Target System is set to the name of the RFC destination (sm59)
SAP Test Function Module
Click Execute (F8)
SAP Result Function Module
The console will also display some information.
Console result
Part 2 will be describe how to build a RFC Server with a custom RFC repository and how to be flexible
with RFC config parameters.
I am Tobias, I write this blog since 2014, you can find me on twitter and youtube. If you want you can leave me a paypal coffee donation. You can also contact me directly if you want.
I am Tobias, I write this blog since 2014, you can find me on twitter and youtube. If you want you can leave me a paypal coffee donation. You can also contact me directly if you want.
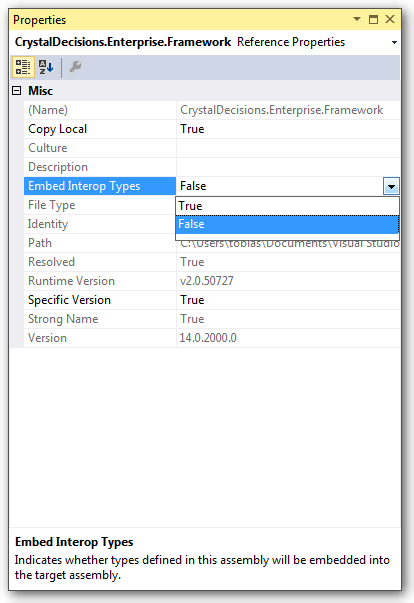
While developing in the Visual Studio for .Net you can get an error like this: „Interop type ‚CrystalDecisions.Enterprise.SessionMgr‘ cannot be embedded. Use the applicable interface instead.“ or
in German: „Interop Typ ‚CrystalDecisions.Enterprise.SessionMgr‘ kann nicht eingebettet werden. Verwenden Sie stattdessen die anwendbare Schnittstelle.“
To aviod this error, you have to change the properties of this reference. You have to switch the „Embed Interop Types“ from True to False.
Visual Studio Reference Properties
After this you can compile your program without an error.
I am Tobias, I write this blog since 2014, you can find me on twitter and youtube. If you want you can leave me a paypal coffee donation. You can also contact me directly if you want.
In the last time I had several problems with external access to a SAP BW System. The access was realized with an old version of the SAP Connector. And that is the problem. If you have a SAP Business Warehouse System
version which is greater than 7.3, you maybe get troubles. For example SAP added new fields or like in 7.4 you now have the option for „Long text is XL“ in the master data. So the old versions
would not work with this.
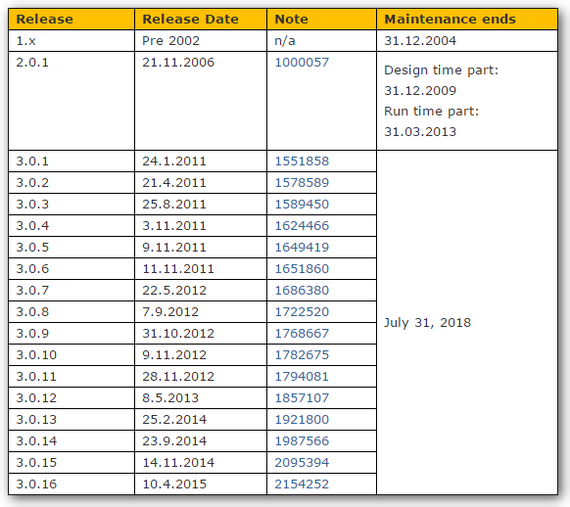
I just found a very good table about the maintenance of all versions in Martins blog.
Overview Support SAP NCo Connector
So to make sure you work with the latest version of NCo, you should have an eye to the SAP Note 856863 or visit service.sap.com/connectors
author.
I am Tobias, I write this blog since 2014, you can find me on twitter and youtube. If you want you can leave me a paypal coffee donation. You can also contact me directly if you want.
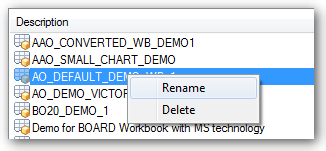
If you want to delete or rename an Analysis for Office Workbook, you have to right click on the Workbook Opendialog.
Analysis for Office Contextmenu
So every user can rename or delete workbook. If you don’t want this, you have to authorize the object S_RS_AO. The object can be add manually in transaction PFCG.
I am Tobias, I write this blog since 2014, you can find me on twitter and youtube. If you want you can leave me a paypal coffee donation. You can also contact me directly if you want.
I am Tobias, I write this blog since 2014, you can find me on twitter and youtube. If you want you can leave me a paypal coffee donation. You can also contact me directly if you want.
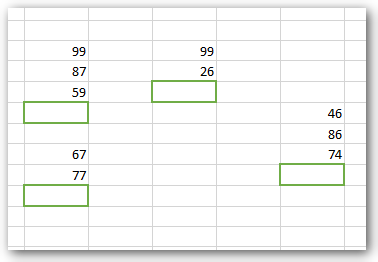
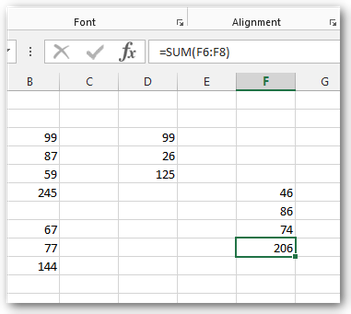
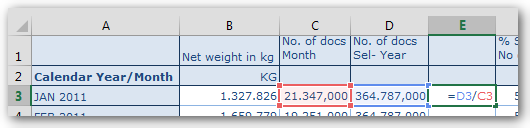
In Analysis for Office 2.2 a new feature was published. You can now use your own Excel formulas in a Crosstab. First you have to add a row or column in your Crosstab. The table design is a feature since Analysis for Office 2.0.
You can add your formula.
Excel formula in Analysis for Office Crosstab
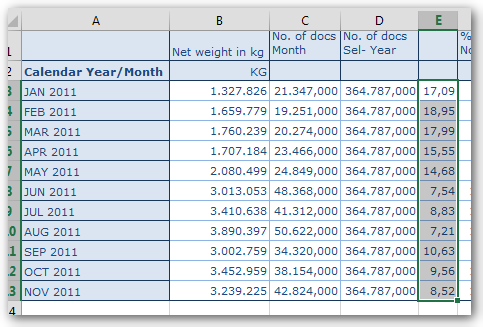
Then you can drag your formula down to the end of the Crosstab.
Expand Excel formula in Analysis for Office Crosstab
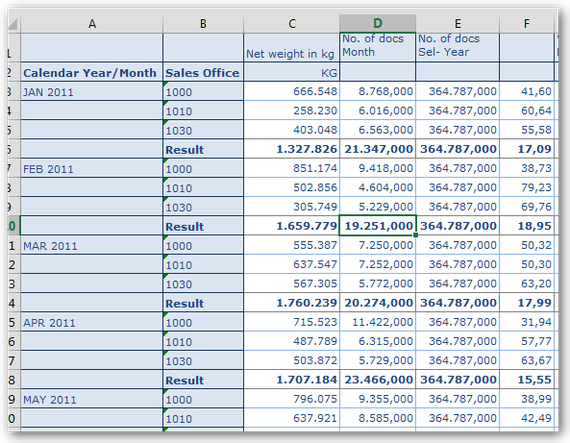
When you now add a new characteristic to the rows, you will see the Excel formula will be automatically adjusts.
Expand Excel formula in Analysis for Office Crosstab
I am Tobias, I write this blog since 2014, you can find me on twitter and youtube. If you want you can leave me a paypal coffee donation. You can also contact me directly if you want.