Here just a short notice if somebody doesn’t know it yet. If you have a false information in a data record you can fix this manually either in a PSA or (A)DSO. Just select the desired entry and
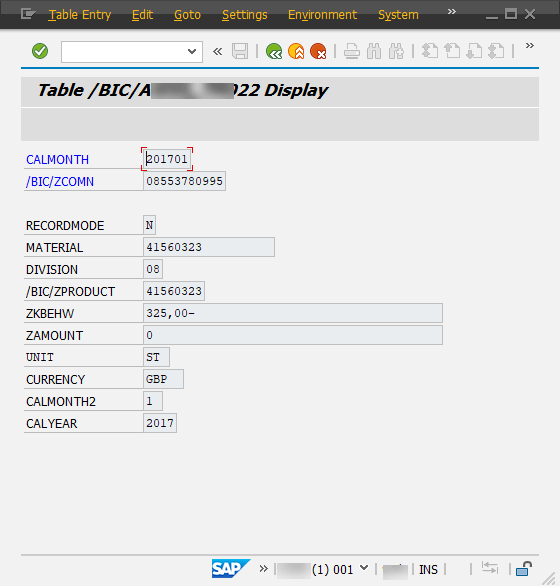
click Display (F7).
Detail view of an entry
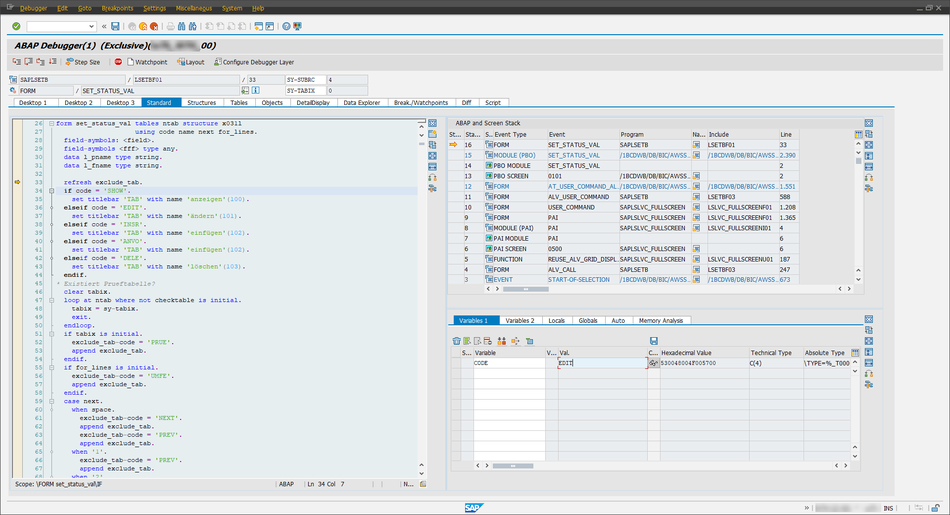
Now click in the menu bar, write /h and click Enter. You now see in the status bar „Debugging switched on“. When you now click Enter again an
ABAP Session will be opened.
ABAP Debugger
Click on the variable code and change it with the pensil to your needs. In my case I used EDIT. Click Enter and than Continue
(F8).
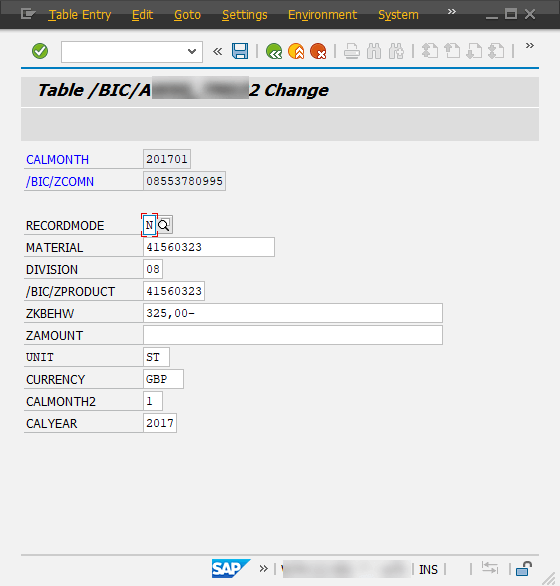
Entry can be edited
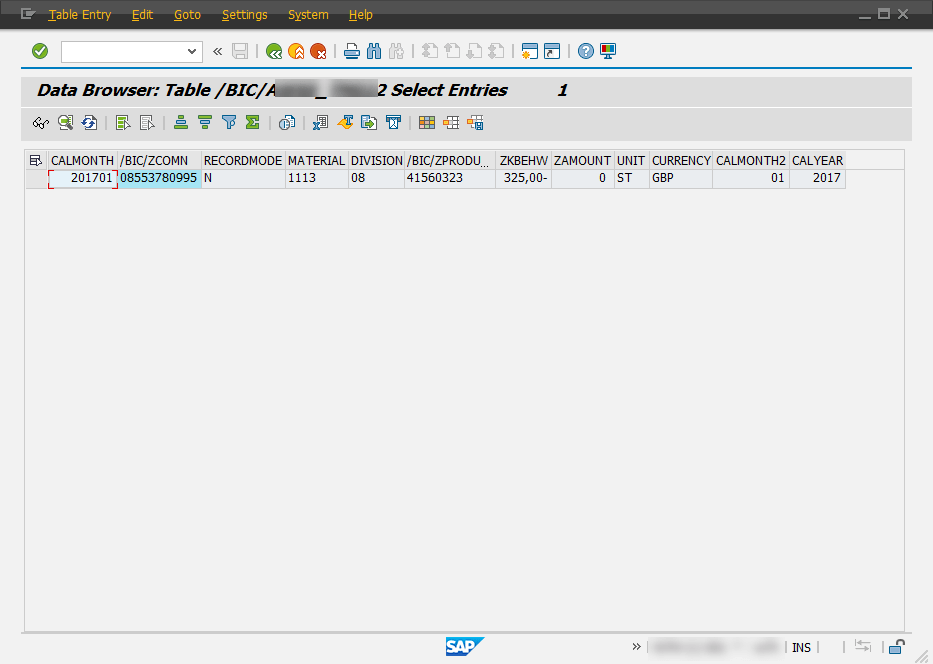
Now I change the material numer to 1113 and save the entry. Here is the result.
In normal case every one should know how this can be done, so it is just a little documation 😉
You can change every SAP table so beware what you are doing.
I am Tobias, I write this blog since 2014, you can find me on twitter and youtube. If you want you can leave me a paypal coffee donation. You can also contact me directly if you want.
In my current project we have a go live. So I needed a function to reset the transport status of some transports. So if you release your transport falsely the transport is locked by release and
can no longer be removed from the transport status. Maybe you also want to delete the entire transport request. This option is also denied as soon as the tasks have been released. The standard
procedures are very laborious and not only cost a lot of time, but also have a certain risk potential. SAP offers a report which solves your problem. The report is RDDIT076.
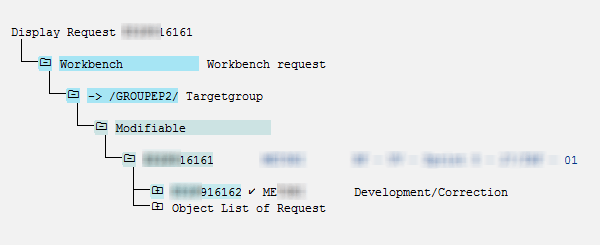
As you see in the next picture, the transport is released.
Transport already released
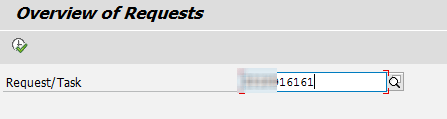
First start the transaction SE38 and execute the report RDDIT076. You now see the selection screen where you choose the corresponding transport request.
Report RDDIT076
After you click execute you see an overview of the requests. Now you have to select the entry you want to change and see the details of it.
RDDIT076 Overview
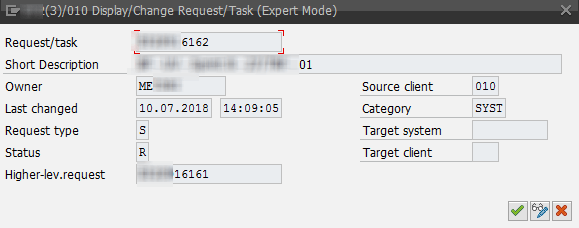
Use the pen to switch into the edit mode and change for example the status to undo the release. Confirm and save the changes.
Change request/task
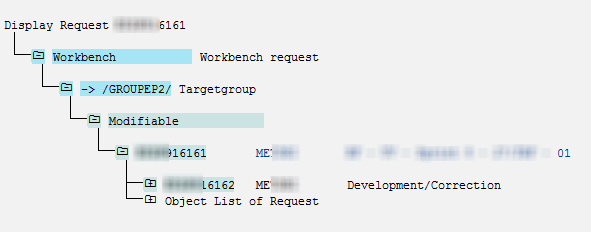
As you can see in this figure the transport request has been reset and it is back in development status.
Transport is modified again
Blame on me, I found an old post which just described the steps. Look here.
I am Tobias, I write this blog since 2014, you can find me on twitter and youtube. If you want you can leave me a paypal coffee donation. You can also contact me directly if you want.
Lately, all my posts started with „In my current project“, so now something else, even if it was developed in the current project. The problem we are facing with is that we get a data extraction
which deliver us only the new data records, not the reverse data record.
Old booked value
New booked value
So we need to build your „own reversal entry“ to set the values of a record to 0. For this we write our ADSO in itself with a formula which delivers the negative value.
SAP BW Negative formula
I build a transformation which the formula above and the magic will be done in the DTP filter. First, let me briefly explain our data model. We use the following layers:
Acquisition Layer
Propagation Layer
Transformation Layer
But back to the magic. The routine is writen in the DTP Transformation Layer in Transformation Layer.
Write an Advanced DSO in itself
First I determine all requests from the Acquistion Layer DSO.
1
2
"Determine all requests from source DSOSELECTDISTINCT ( reqtsn ) FROM /bic/avf0aperia1INTOTABLElt_requests.
After I have all requests in my internal table, I sort it descending to get the right order.
After I execute the DTP and activate the request in the transformation layer advanced DSO you see there are only 18 entries which are corrected.
Number of entries which are false
When you now look into the active table of the advanced DSO, you see all values which are shown above are now 0.
Active table values
The changelog also show the new, the before and the after image for the entries. So you can understand what was booked.
Changelog View
And when we now execute all DTPs to write the data from the Acquistion Layer to the Tranformation Layer, we see that there are only 18 entries which are new.
Requests of the advanced DSO
And also the new booked values are the same we have above in our second extract.
New values in advanced DSO
As you can see it is very easy to create your own reversal entry if the source system don’t deliver one. I hope someone can need it.
author.
I am Tobias, I write this blog since 2014, you can find me on twitter and youtube. If you want you can leave me a paypal coffee donation. You can also contact me directly if you want.
I know that I don’t publish a lot of new posts the last few weeks. The reason is I am writing on my diploma thesis. The title is „S/4HANA versus BW/4HANA – Zukunft der Datenanalyse“. My deadline
is in the middle of September so I have to write a lot these days. At the moment, I have access to a BW/4HANA instance in the cloud and I want to share how you could export your development
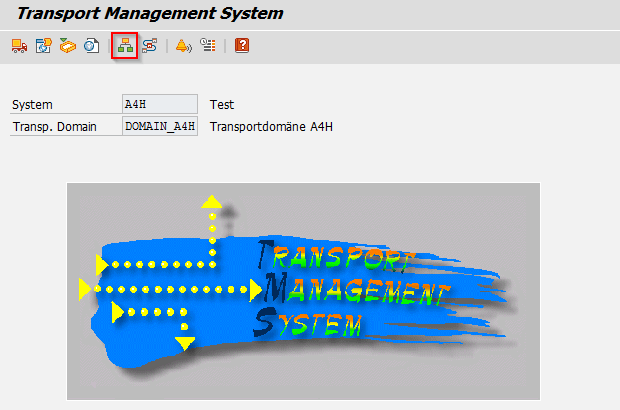
before you terminate the instance. First you have to log on with the SAP* user in the client 000. Go to the transaction stms and select the System Overview.
BW/4HANA Transaction stms
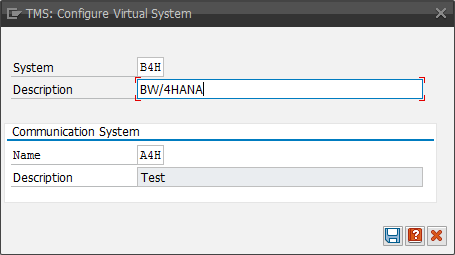
After you select the System Overview, choose SAP System > Create > Virtual System.
BW/4HANA Create Virtual System
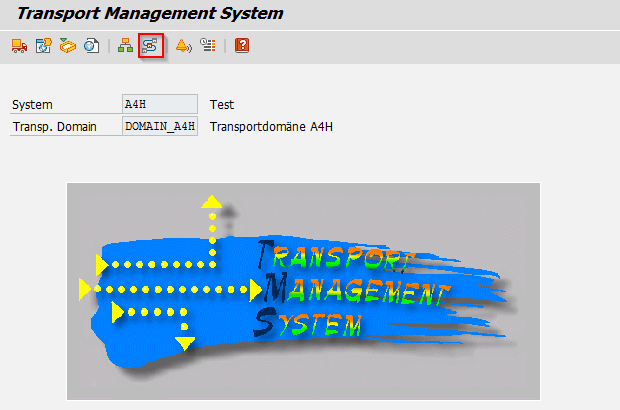
Return to the stms transaction and select Transport Routes.
BW/4HANA Select Transport Routes
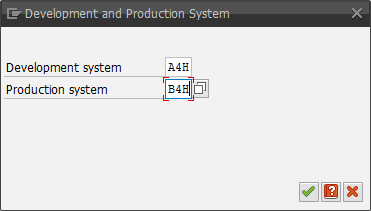
Open it in change mode and select Open Configuration > Standard Configuration > Development and Production System. Assign the current system as Develeopment System and the virtual system as
Production System.
BW/4HANA Connection between Development and Production System
The route will be created. Now saveand activate the configuration. Now you can release your transport. After you have released your transport, have a look into the DIR_TRANS
directory in the transaction al11. There you find the folder cofiles and data. In this folders you find the necessary files. You can download
these files with the function module ARCHIVFILE_SERVER_TO_CLIENT. If you want to import the files again, use the function module ARCHIVFILE_CLIENT_TO_SERVER.
author.
I am Tobias, I write this blog since 2014, you can find me on twitter and youtube. If you want you can leave me a paypal coffee donation. You can also contact me directly if you want.
I described in a earlier post how to use BW/4HANA on Amazon AWS. But if you just need a developing system for some time
and don’t want to use BW/4HANA, you can use the BW 7.5 SP2 developer edition on a virtual machine.
There are a good post on the SCN. First you have to download Oracle VirtualBox. After that you have
to download openSUSE. If you are a Linux Newbie you can read the following post how to install openSUSE on VirtualBox. The BW 7.5 SP2 developer edition can be found here.
After you have downloaded everything and your openSUSE is running you should read this post to get the installation of the BW done. I needed a BW 7.5 for the new
edition of my book, so it was a nice variety for me.
I am Tobias, I write this blog since 2014, you can find me on twitter and youtube. If you want you can leave me a paypal coffee donation. You can also contact me directly if you want.
In my current project, we have to deal with 30.000.000 records for the initialization run and about 10.000.000 records each day. The big problem is we have no SAP HANA system for BW. So, we have
to build a perfect data model to load the data and push it through the BW to deliver it to another DWH system. First I want to describe how our first steps worked and then which parameter we
changed to make it more efficient. I will also describe where we had our problems and how we have solved them. So let’s go.
We receive the data from a Bank Analyzer (BA) system and have to put it into a DataStore-Object (DSO) to get a delta logic. So, we designed a Semantic Partitioning Object (SPO) with the criteria
0FISCPER. We don’t want to build it on 0CALMONTH because this can nobody administrate. In the routine, we have to do some logic for master data because we get a master data record not every day,
so we decided to build a DSO which it build like a time-dependent InfoObject. The reason why we would use a time-dependent InfoObject is, because we also have 10.000.000 records and this is hard
to execute the attribute changes for so many records.
So when we get a new record we set the valid-to date to 31.12.9999 and when we receive a new entry for the same record, we adjust the valid-to date to new start date minus 1. In case we have to
make a build the records for the transaction data again, we have a clean history.
Our first load from the data source into the data acquisition layer for the 30.000.000 records last 3 hours. Plus activation of almost 2 hours. So that we have
the data only in the first layer of our data model took us 5 hours + 1 hour to extract it from the source system.
First Layer of the data model
After we had the data in the data acquisition layer we want to load it into InfoCubes for reporting and add also some logic. We build a SPO again, but this time we separated it into 0FISCPER and
accounting system (AS). So we have now instead of two cubes (2016 and 2017) now four cubes (2016 AS1, 2016 AS2, 2017 AS1, 2017 AS2). So next year we get two new cubes and so on.
Now we have only around 15.000.000 records for each accounting system. Just a note, the test data is only for 2016 so we have no data for 2017. The initial load of the data from the changelog of
the DSO took us more than 16 hours.
Second layer of the data model
Summary
Until a user can execute his report with the new data, he had to wait about 22 hours. So we have to analyze what our problems were:
Consider the transformation from the data source to the DataStore-Object
See if we could accelerate the activation process of the DSO
Consider our InfoCube design to see where we lost so much time
Activities
So our big issue was that it took us round 7 minutes for one package of 50.000 entries into the InfoCube. So, we analyzed the data model which exists from a former project with the report SAP_INFOCUBE_DESIGNS. And it showed us that we have three terrible dimensions. After we fixed the design of the InfoCube we load the data again and it took us now 3 hours. This is an improvement of to 19% of the original time. So it is very important how your data model is designed. Especially when you have to deal with
mass data.
Besides the data model we also add number range buffering for DIM IDs and SIDs. For more information have a consider SAP Note 857998. This also improve our activation time, but
more about that later. So now we have to deal with the 3 hours of data loading from the data source to our DSO.
We looked into our start- and end-routines and adjust our ABAP code so now we were down from 3 hours to 42 minutes. This is now only 23% of the
original time. These two big improvements saved us about 15 hours. So we are now down from 22 to 7 hours for the processing. Besides our data
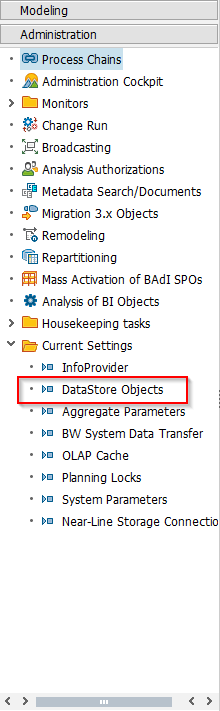
model and ABAP correction, we also increased our parallel processing. For this open the RSA1 and click on the administration tab and select under Current Settings >> DataStore
Objects. You can also execute the report RSODSO_MAINTAIN_SETTINGS.
DataStore Objects Settings
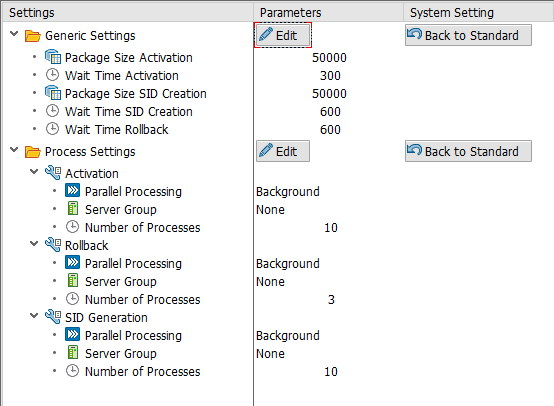
Select now your DSO and you can edit the parameter on the right side. For example, we choose the Package Size Activation with 50.000 and the Package Size SID Creation with 50.000. Besides these
two sizes we also adjust the parallel processing of activation and SID generation to 10 processes. This maybe depends how many processes your system have.
DataStore Object adapted settings
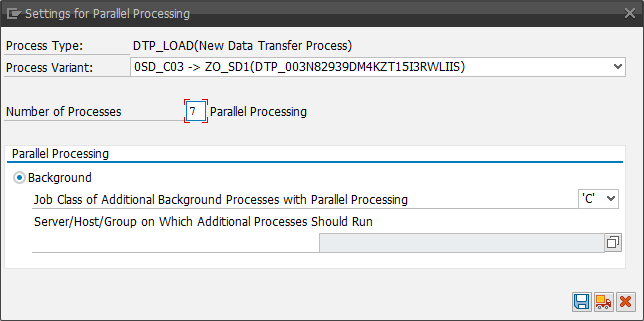
And we also increased the parallel processing of the DTP to 7 from 3 processes.
DTP settings for parallel processing
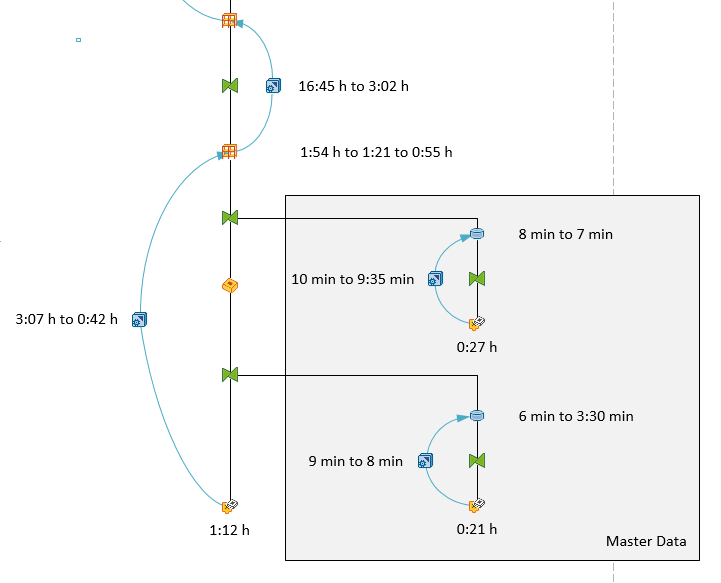
The next step was to improve the activation time. Our first try was 1 hour 54 Minutes. After we add the buffering of number ranges, we went down to 1 hour 25 Minutes. It is a benefit of 29 Minutes or round 26%.
So we have now a data loading time down from 23 hours to 6 hours 30 minutes. So we are now only need 28 % from the time of our
first try. This is really impressive, because you have to keep in mind, that we have no HANA system.
I am Tobias, I write this blog since 2014, you can find me on twitter and youtube. If you want you can leave me a paypal coffee donation. You can also contact me directly if you want.
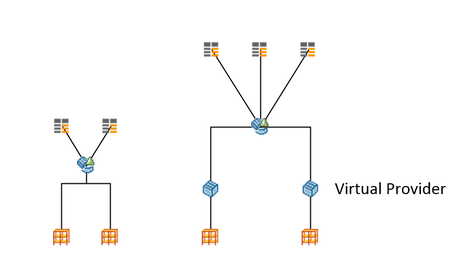
In my current project, we want to separate the current MultiProvider with VirtualProvider underneath into one MultiProvider with VirtualProvider and one MultiProvider without VirtualProvider.
This step is necessary, because we receive a lot of data and don’t want to push all these data through the VirtualProvider. The VirtualProvider only add one field which we haven’t got in our
InfoCubes and it isn’t necessary in all queries just a few.
Old with only one MultiProvider
New with two MultiProviders
So we decided to split the existing MultiProvider into two. This means, we have to transfer some of the existing queries from the current MultiProvider to the new one. Because we don’t want to
build them, especially when the MultiProviders have the same structure.
You can either use the transaction SE37 with the function module RSZ_I_COPY_QRY_TO_CUBE_SINGLE or use the transaction RSZC. I will describe both
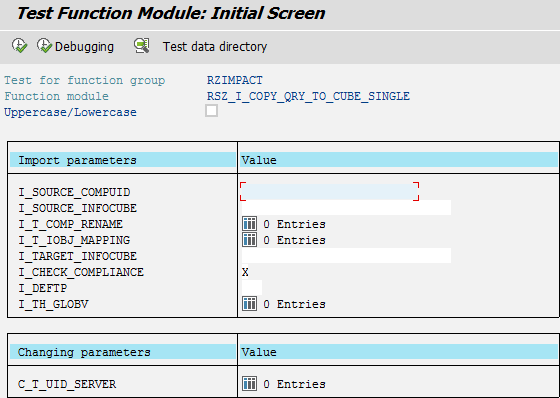
ways. Open the transaction SE37 and execute the function module RSZ_I_COPY_QRY_TO_CUBE_SINGLE. You should see the following screen.
Function Module RSZ_I_COPY_QRY_TO_CUBE_SINGLE
Into the field I_SOURCE_COMPUID you have to fill the COMPUID which you can find out with the table V_REP_JOIN. The field I_SOURCE_INFOCUBE is your source provider and the I_TARGET_INFOCUBE is your destination provider. You have also to remove the X in I_CHECK_COMPLIANCE. Now you can execute the function module and your query is copied to the new MultiProvider.
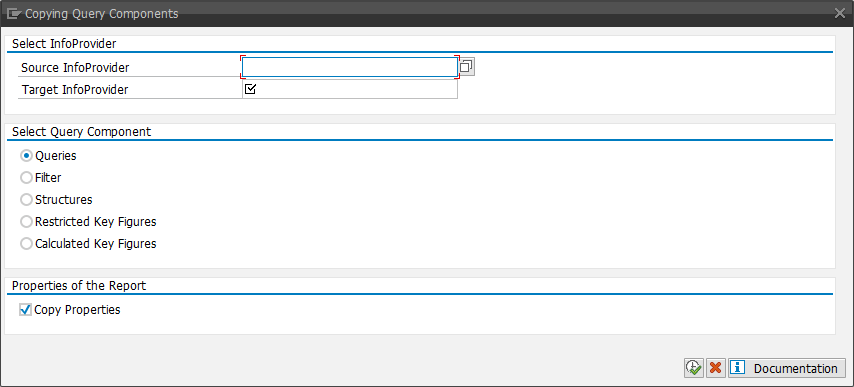
The other way is to use the transaction RSZC. If you use it, you should see the following screen.
Transaction RSZC
This screen explains itself. Into Source InfoProvider you have to put your source MultiProvider and into Target InfoProvider the destination. You can choose what
you want to copy. For example:
Queries
Filter
Structures
Restricted Key Figures
Calculated Key Figures
The transaction RSZC makes it very easy to copy a lot of queries at once. I hope this help someone, so you haven’t to build all your queries again on a new MultiProvider.
author.
I am Tobias, I write this blog since 2014, you can find me on twitter and youtube. If you want you can leave me a paypal coffee donation. You can also contact me directly if you want.
Sometimes it is necessary to check your data model if it still fit your needs. For this you can use the transaction rsrv. Select there under All Elementary Tests >>
Database >> Database information about InfoProvider tables.
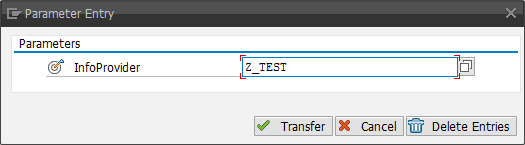
Now you can enter one InfoCube and choose Transfer. Now you can add more tests or click Execute to run the test.
Enter Parameter Entry for database information
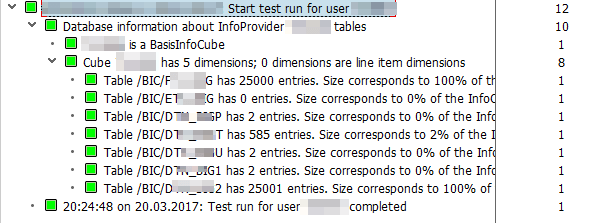
After you click execute, you will see the log.
Log about the test
As you can see, the design of dimension 2 is very bad. It contains 100% of the entries of the f-table. So now we can plan our redesign. You can also check your cube design with the report SAP_INFOCUBE_DESIGNS. How important a good InfoCube design is, will I show you in a futher post.
I am Tobias, I write this blog since 2014, you can find me on twitter and youtube. If you want you can leave me a paypal coffee donation. You can also contact me directly if you want.
In my current project I had to clean up the existing process chains. A lot of process chains were created via SPOs and not really used in the system. First I had to check, if one is used in a another process chain or in which one they are used.
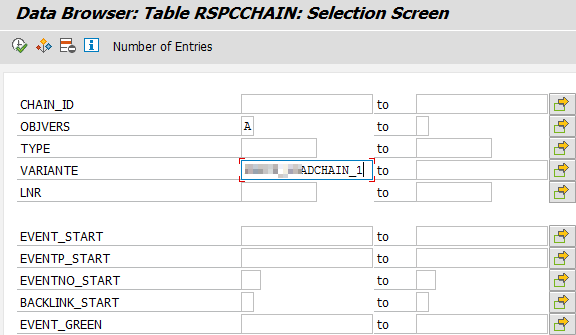
In the transaction SE16 open table RSPCCHAIN and insert into VARIANTE the technical name of your process chain.
Table RSPCCHAIN find variante
The column CHAIN_ID shows you the corresponding meta-chain.
I am Tobias, I write this blog since 2014, you can find me on twitter and youtube. If you want you can leave me a paypal coffee donation. You can also contact me directly if you want.
In my current project we have to transport from a maintenance system to our development system. The problem is when you now transport the objects into quality system, you have to check the option
„Overwrite Originals“ so that your transport is working. But you have to put this flag on every transport you make in the future from your development system to quality.
Nobody will remember this after a huge project, so every request has to be transported twice and this is annoying. So we have to find a solution for this. I found a thread on the SCN which describes a solution that worked for me. Yes I found a link which is
still working after the redesign of the SCN. I was surprised. Here is the solution:
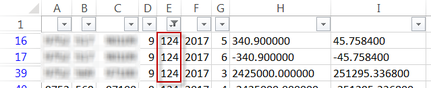
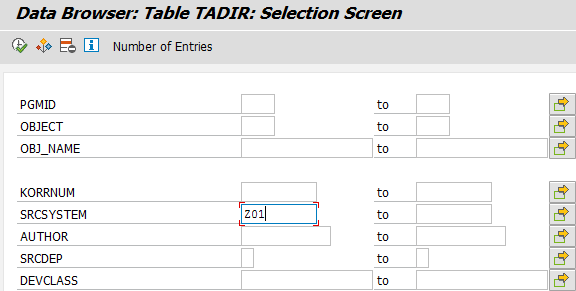
First you can check in the transaction SE16 the table TADIR how many objects are not correct. You can filter with the field SRCSYSTEM. In my
case I looked for the SRCSYSTEM Z01.
SE16 Table TADIR
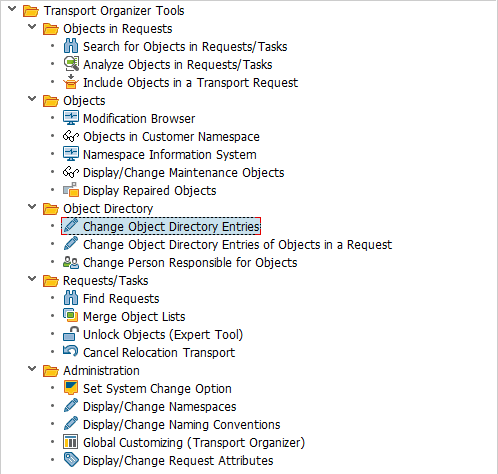
Now open the transaction SE03 and choose under Object Directory >> Change Object Directory Entries.
SE03 Change Object Directory Entries
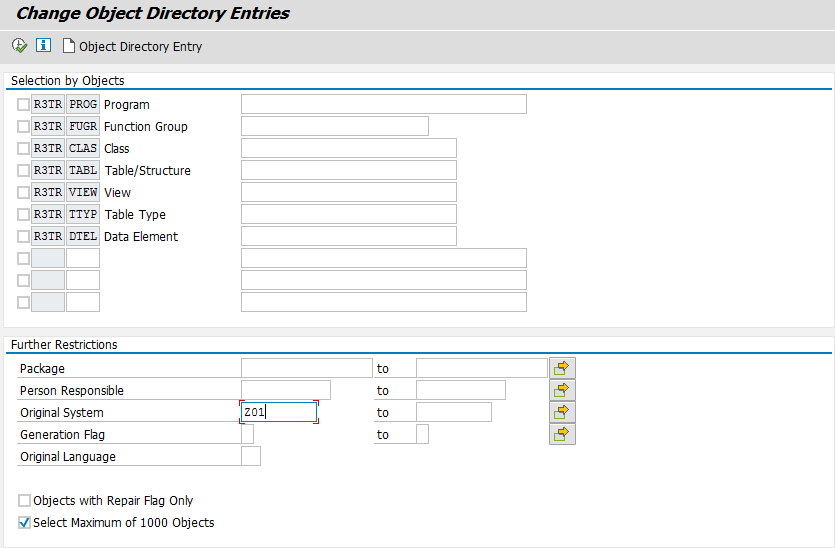
Now you see a screen, where you can restrict your selection, in my case I want to find all objects which original system is Z01. After you filled your parameters click Execute (F8).
Change Object Directory Entries Restrictions
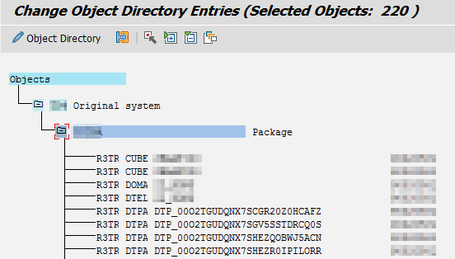
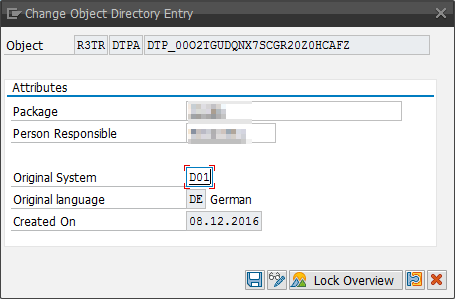
You can either select each entry with a double click and edit it.
Change Object Directory Entries
Change Object Directory Entry
Or you can select a bunch of entries with F6 or the menu item Select/Deselect.
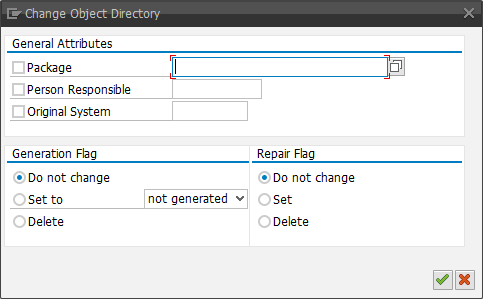
And enter MASS in the transaction code field and press Enter. Now you get a other dialog displayed, which allows you change all object at once.
Change Object Directory MASS
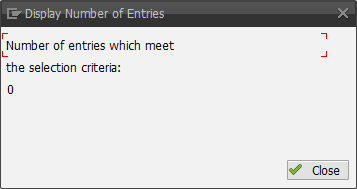
As you can see it is really easy to change the source system of objects. If you now check the table TADIR, you will see that there are all entries for Z01 are
gone.
I am Tobias, I write this blog since 2014, you can find me on twitter and youtube. If you want you can leave me a paypal coffee donation. You can also contact me directly if you want.