Since yesterday Analysis Office 2.6 SP3 is available. You need as always a S-User to download the latest version. Here is a short overview what it might fix.
„Create Web Application“ button is not enabled when SAP Lumira Designer is installed (s-note 2636541)
Correct sorting of members of type CalendarDay or DateTime in Filter Dialog (s-note 2625487)
Exception after saving workbook as PDF (s-note 2633496)
Filter Dialog does not update Hierarchy after switch of Access Mode (s-note 2637491)
Grouped Crosstabs: Expanding and Filtering in the Columns does not work (s-note 2637846)
Inserted chart does not reflect complete data (s-note 2635814)
Link Dimensions: Issues with drag and drop (s-note
2610471)
Performance Issue related to many Shared Strings in Workbook (s-note 2638243)
I am Tobias, I write this blog since 2014, you can find me on twitter and youtube. If you want you can leave me a paypal coffee donation. You can also contact me directly if you want.
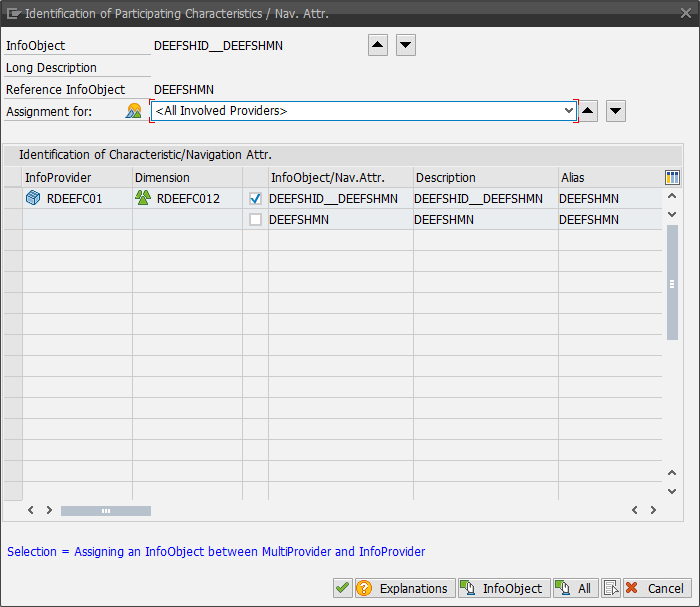
In my current project we run into an issue that we have to match navigation attributes from one ADSO to an infoobject of another ADSO. The old feature of a MultiProvider was to Identify (assign).
SAP BW Assign infoobject to MultiProvider
So I searched for the correlating setting in BW Modeling Tools for Composite Provider and I found nothing in my SAP BW 7.4 SP17. After a little research I found that a SAP BW 7.5 has this
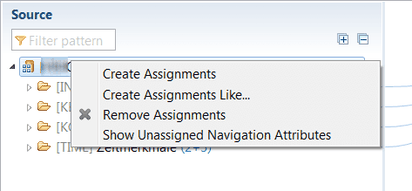
information. It is hide under „Show unassigned Navigation Attributes„.
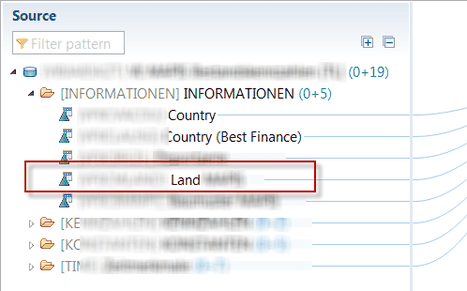
Eclipse: Show Unassigned Navigation Attributes
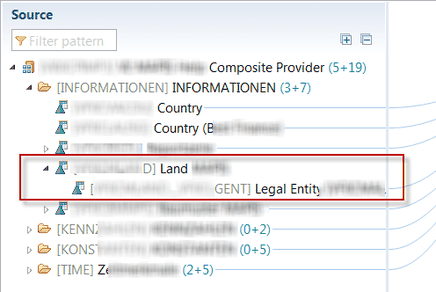
Eclipse: Assign Navigation Attributes to InfoObject
If you show the unassigned navigation attributes, you can assign them to a normal InfoObject like the old MultiProvider. But a SAP BW 7.4 has no such setting.
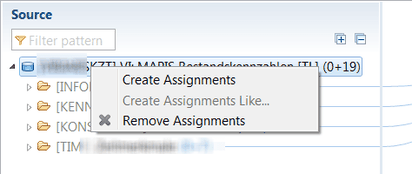
Eclipse: No Show Unassigned Navigation Attributes
Eclipse: No navigation attributes to assign
I found this Wiki entry, which
descibes exactly what I need. At the end there is an information which is important if you use Advanced Data Store Objects. You have to read the s-note 2215947. The solution is to build one CompositeProvider (HCPR)
with your ADSO and its navigation attributes.
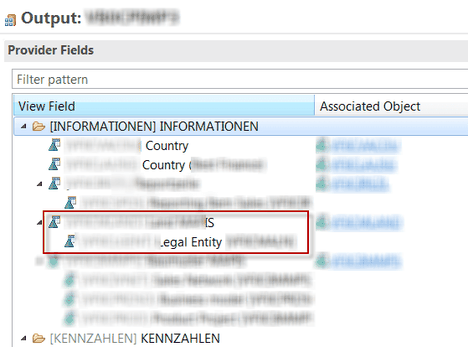
Eclipse: Activiate Navigation Attribute on Output tab
Then activate the setting „This CompositeProvider can be added to another CompositeProvider“and add the first CompositeProvider to a new CompositeProvider. Now you are able to assign the
navigation attributes to a characteristic in the output of the new CompositeProvider.
I hope this can help someone to solve a similar problem.
author.
Hi,
I am Tobias, I write this blog since 2014, you can find me on twitter, facebook and youtube. I work as a Senior Business
Warehouse Consultant. In 2016 I wrote the first edition of . If you want you can leave me a paypal coffee
donation. You can also contact me directly if you want.
I hope you can help me, to find out if there is any interesting about a book that covers BW Backend topics. I think about a book which covers SAP HANA, AMDP/ABAP, BW Administration and so on.
Thanks for your time.
Powr.io content is not displayed due to your current cookie settings. Click on the cookie policy (functional and marketing) to agree to the Powr.io cookie policy and view the content. You can find out more about this in the Powr.io privacy policy.
author.
I am Tobias, I write this blog since 2014, you can find me on twitter and youtube. If you want you can leave me a paypal coffee donation. You can also contact me directly if you want.
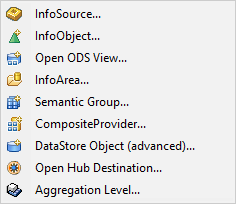
If you want to create a Composite Provider in the BW Modeling Tools, you have to choose New >> Composite Provider in the context
menu of your InfoArea or File >> New >> Composite Provider.
Create new CompositeProvider
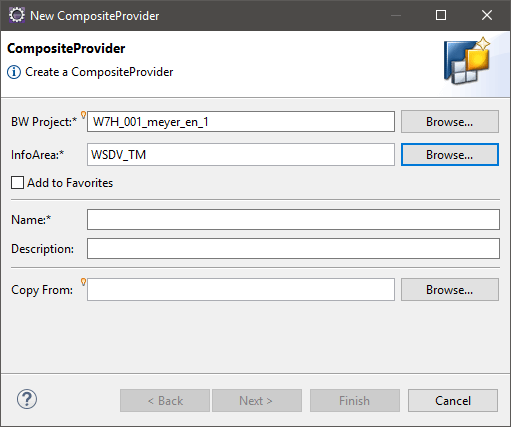
After you choose the CompositeProvider, a new dialog appears which allows you to define the InfoArea, Name, Description and if you want to copy it from another CompositeProvider (HCPR). You can
add it straight to your favorites if you want.
Define Compositeprovider (HCPR)
After you defined a name and the description, you can click Next to get the dialog to select part providers.
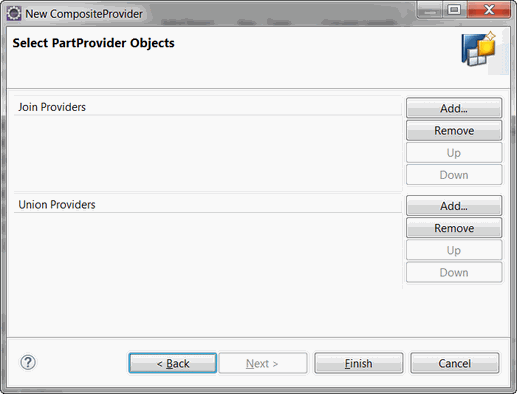
Select PartProvider for CompositeProvider
You can choose between Join Providers and Union Providers. Either all Part Providers are treated like InfoCubes in MultiProviders or you choose Join Providers to join your Part Providers
like an Infoset.
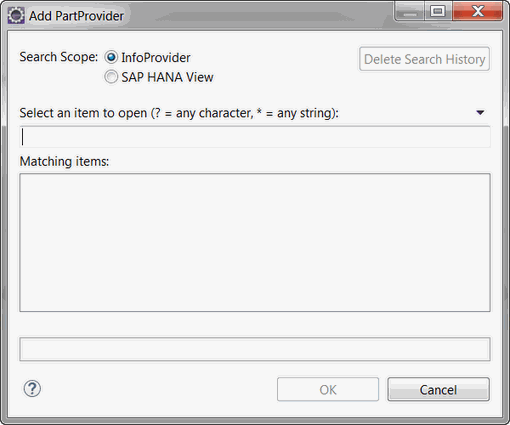
Add PartProvider
Use the search to find your part provider. After you found it, click OK and Finish. You now see the General tab of your Composite Provider.
General Tab of your CompositeProvider
On the General tab you can configure settings of your CompositeProvider. You can decide if you want to create an External SAP HANA View, to use your CompositeProvider with a
Calculation View for example. You can also define if your CompositeProvider can be added to another CompositeProvider. This will be decribed in this blog post. You can define the common runtime properties and the runtime profile properties.
Scenario tab of your CompositeProvider
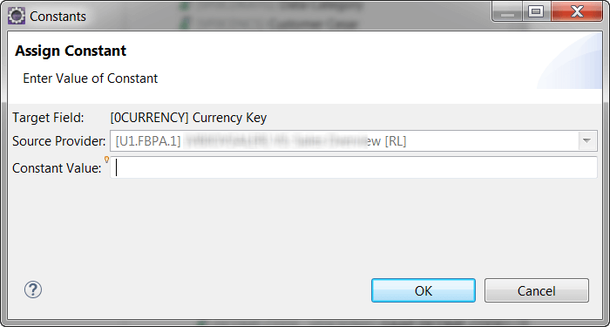
The Scenario tab is the main thing when you create your CompositeProvider. You have to assign your source fields to your target fields. Like the above an 1:1 Mapping or you can assign a constant
value via the context menu of your target.
Assign constant value
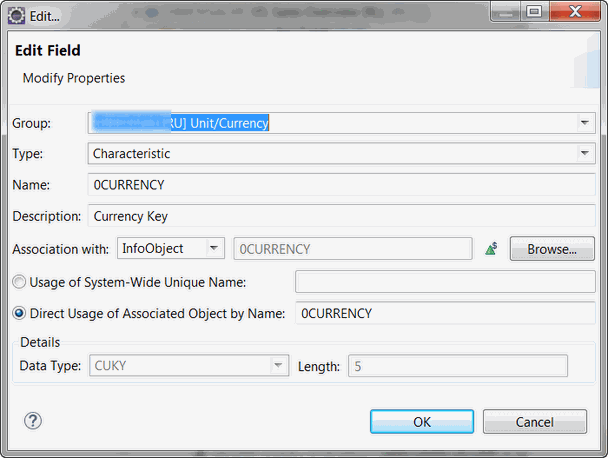
Or you can use the context menu to edit a field and its properties.
Edit field properties
Or you can just remove the assignment and a false field. It is your choice 😉 If you select your part provider in the source panel, you receive the following context menu.
Show Unassigned Navigation Attributes
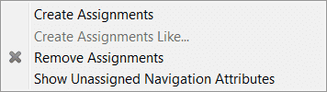
If you choose Show Unassigned Navigation Attributes, you can see the navigation attributes of an InfoObject and assign it to a characteristic directly. This topic is different for BW
7.4, so I cover this in a separate post. The following screenshot shows how it looks like when you have BW 7.5.
See unassigned navigation attributes
You can also rename and delete or create the groups of your target so you can find your fields easily in your query.
Manage groups of your CompositeProvider
The next part is the Output tab. On the output tab you can define several things for an InfoObject. Select an InfoObject and the following screen appears.
Output tab of your CompositeProvider
You can for example associate a field based ADSO with InfoObjects to receive master data and authorizations. Or if you have an InfoObject with navigation attributes, you can select them bei
clicking on an InfoObject and select the context menu.
Select navigation attributes
This is how you create a CompositeProvider with Eclipse. This may change in future releases. If you have some questions, post them into the comment section below.
author.
I am Tobias, I write this blog since 2014, you can find me on twitter and youtube. If you want you can leave me a paypal coffee donation. You can also contact me directly if you want.
Since last week the new version of my book SAP Analysis Office – The Comprehensive Guide is now available. You can find it only here
in my shop. The book is based on Analysis Office 2.6 and covers
now all about:
Customizing Analysis Office including file system settings
The basic stuff with Analytics Cloud
The advanced stuff like Table Design and Group Members
The API and formula functions
Troubleshooting and so on
The table of content can be found here. If you have any questions feel free to
write them into the comments.
One question from me:
Is it ok, that there is only Paypal as payment method or do you need more? Just write it in the comments and I will see what I can do.
author.
I am Tobias, I write this blog since 2014, you can find me on twitter and youtube. If you want you can leave me a paypal coffee donation. You can also contact me directly if you want.
Analysis Office 2.6 SP2 is available since two weeks. There are only some slight changes to Analysis Office 2.6 SP1. You are now able to set the selection type for the formula SAPSetFilterComponent to MEMBERSELECTORBYRANGE. So you can use it to define the filter dialog with range option as standard.
Also a new selection type for the VBA API SAPCallMemberSelector is now available. It is called MULTIPLEBYRANGE, which allows you to select a range of members for
filtering. So if you found new functions, feel free to write them down in the comments.
I am Tobias, I write this blog since 2014, you can find me on twitter and youtube. If you want you can leave me a paypal coffee donation. You can also contact me directly if you want.
Since two days the new version of Analysis Office 2.6 is available. You need as always a S-User to download the latest version. Here
is a short overview what it might fix:
AO 2.x: Table Design Formulas causes crash on initialze of Design Rules Tab if no applicable Data was found (s-note 2609841)
Analysis Office: Existing workbook in favorites folders on BIP will not be overwritten (s-note 2614892)
Analysis Office: Grouping crosstabs from different worksheets throws an exception (s-note 2614536)
Analysis Office: System alias of a query defined on BIP server is overwritten (s-note 2616663)
Filter Component results in error with Manual Calculation Mode (s-note 2605076)
Filter on Characteristics used in Restriction is lost after additional characteristic is used (s-note 2614466)
No drop down to select the date for between condition (s-note 2615430)
Undo operation for restriction fails (s-note 2606838)
A overview what’s new will be available next week. If you find something interesting, please feel free to post a comment.
author.
I am Tobias, I write this blog since 2014, you can find me on twitter and youtube. If you want you can leave me a paypal coffee donation. You can also contact me directly if you want.
Here is a short post about something I just found and never used until now. You can create restrictions in Analysis Office by either
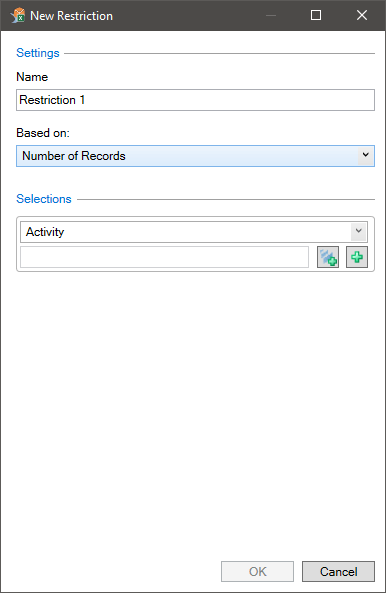
using the context menu of a measure or via the ribbon menu entry under Calculations >> Add Restrictions. It will display a new dialog where you can define your restrictions.
Analysis Office Add new restriction
You have to define a name, a based on measure and your selection(s). After you defined your parameters, click OK and a new column will be added to your crosstab.
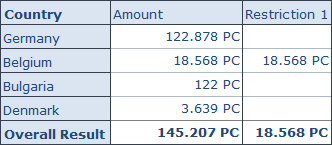
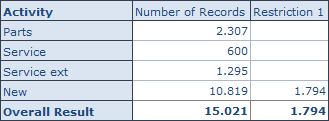
Crosstab with Restriction
As you can see the restriction just show I have defined on my selection in the dialog above. I hope this could help someone.
I am Tobias, I write this blog since 2014, you can find me on twitter and youtube. If you want you can leave me a paypal coffee donation. You can also contact me directly if you want.
Analysis Office 2.6 SP1 is available since last week. When you look at the What’s new guide from SAP, you see nothing spectacular new. You have now a new file system setting called AlwaysDoApplicationSteps. You can use this setting to write entries into the table RSDDSTAT_OLAP afer each action without the need to close Analysis Office.
There is also a new style called SAPDataRemoved, to format cells whose data was removed with the workbook property Remove Data Before Saving. Also you have now more
options for scheduling a workbook on the BI platform.
That’s it. As you can see it is not much new. I think the most what was done is bug fixing.
I am Tobias, I write this blog since 2014, you can find me on twitter and youtube. If you want you can leave me a paypal coffee donation. You can also contact me directly if you want.
In my current project I have a file to import, which only delivers me a string with a length of 1000. I also get a description what is in this file. Like the following points:
Customer from 1 to 10
City from 11 to 50
The file looks like: 0000123456London………………………. So I have a file and a description how to decode this file. Now I need to find a way to separate this information into
InfoObjects. I build a Z-Table which contains the decode information.
Z-Table to decode information
The content look like the following example.
Z-Table content
After I filled all my necessary information into the table, I started to write my code in an expert routine. First I need some variables and internal tables.
1
2
3
4
5
6
7
DATA: lt_table0TYPETABLE OFz_dec,
ls_table0LIKE LINE OFlt_table0,
lt_table1TYPETABLE OFz_dec,
ls_table1LIKE LINE OFlt_table1,
lv_startTYPEi.
FIELD-SYMBOLS: <fv_source>TYPEany.
After the variable declaration, we have to select our data and sort the internal tables.
LOOP AT SOURCE_PACKAGEASSIGNING<source_fields>.
IF<source_fields>-field1(1) =0.
LOOP AT lt_table0INTOls_table0.
"First I need to find the start of my informationlv_start=ls_table0-startfrom-1.
"Now I assign the infoobject to my result structureASSIGNCOMPONENTls_table0-infoobjectOF STRUCTURERESULT_FIELDSTO<fv_source>.
"Here I write the value of string into the corresponding infoobject<fv_source>=<source_fields>-field1+lv_start(ls_table0-length).
ENDLOOP.
"Here we append the RESULT_FIELDS to the RESULT_PACKAGE.APPENDRESULT_FIELDSTORESULT_PACKAGE.
ELSEIF<source_fields>-field1(1) =1.
LOOP AT lt_table1INTOls_table1.
"First I need to find the start of my informationlv_start=ls_table1-startfrom-1.
"Now I assign the infoobject to my result structureASSIGNCOMPONENTls_table1-infoobjectOF STRUCTURERESULT_FIELDSTO<fv_source>.
"Here I write the value of string into the corresponding infoobject<fv_source>=<source_fields>-field1+lv_start(ls_table1-length).
ENDLOOP.
"Here we append the RESULT_FIELDS to the RESULT_PACKAGE.APPENDRESULT_FIELDSTORESULT_PACKAGE.
ENDIF.
ENDLOOP.
So when we now see the import file, which looks like the following.
Import File
The result looks like the a normal import.
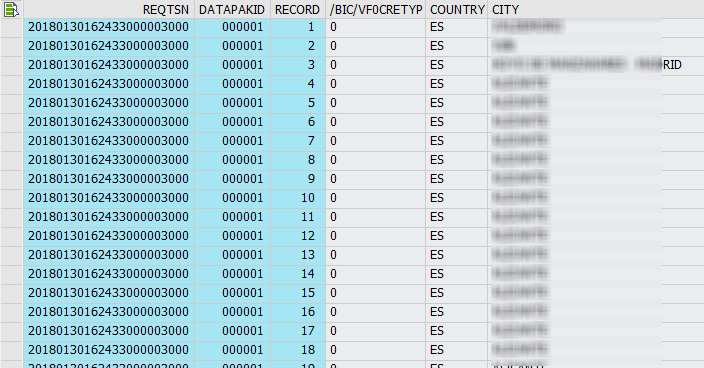
Result after import
You can download the whole source code from github. If
you have questions, feel free to ask.
I am Tobias, I write this blog since 2014, you can find me on twitter and youtube. If you want you can leave me a paypal coffee donation. You can also contact me directly if you want.